大家对于Qt已经非常了解了,但是什么事PyQt呢?首先他是一个对于qt框架的python封装,最后还是调用的c++的接口,所以很多参数传递也要遵照C++的函数接口传入,所以并不是qt就不用学习了。
既然要学习PyQt,那么我们就需要了解Python 类的用法,由于Python是解释性语言,相比编译型的语言显得比较简单,这里不过多展开叙述Python 类的写法,就说一个需要注意的事项:
class Example(QtGui.QWidget):
    value = 0
    __privateValue = 1
    def __init__(self):
        super(Example, self).__init__()
        self.initUI()


    def initUI(self):
        self.setGeometry(300, 300, 250, 150)
        self.setWindowTitle('Icon')
        self.setWindowIcon(QtGui.QIcon('web.png'))

        self.show()
class Example括号里面代表继承的父类,__init__(self)是class Example的构造函数,而super(Example, self)返回了Example的父类(即QtGui.QWidget),接着调用父类的构造函数。value是Class Example的公有成员变量,__privateValue 以两个下划线开头是属性的私有变量,私有方法也是以__开头。
class Parent(object):        # 定义父类
   parentAttr = 100
   def __init__(self):
      print '调用父类构造函数'


class Child(Parent): # 定义子类
   def __init__(self):
      super(Child, self).__init__()
      print "调用子类构造方法"

c = Child()          # 实例化子类
对于Python类继承顺序,并不是很多blog种使用super方式访问父类,虽然从表象上,使用super(Child, self).__init__()可以访问父类的构造函数,但实际上super的真正实现不是这样子,super返回的是继承顺序中的下一个!详见 https://rhettinger.wordpress.com/2011/05/26/super-considered-super/ 这个关键字在多继承中出出现与常规OOP语言中不同的现象!(https://www.zhihu.com/question/20040039)这里就是不再展开了。只需要记住:在 MRO(Method Resolution Order) 中,基类永远出现在派生类后面,如果有多个基类,基类的相对顺序保持不变。
def main():
    app = QtGui.QApplication(sys.argv)
    ex = Example()
    sys.exit(app.exec_())

if __name__ == '__main__':#Python中常用的定义入口点方式
    main()
我们只需要关注与main函数中的实现就好。除此之外还默认提供了getattr、setattr方法。
- getattr(obj, name[, default]) : 访问对象的属性。obj就是类的实例,第二个就是类成员变量。
- hasattr(obj,name) : 检查是否存在一个属性。
- setattr(obj,name,value) : 设置一个属性。如果属性不存在,会创建一个新属性。
- delattr(obj, name) : 删除属性。
PyQt中采用了与qt类似的信号嘈机制,只是写法与c++中略有不同,比如我们声明一个控件exitAction,我们只需要把exitAction.clicked.connect(QtCore.QCoreApplication.instance().quit)就可以退出当前的对话框。在写代码这块代码的时候,我发现 fileMenu = menubar.addMenu(‘&File’) 这种类型的语句,&File ,这个&不是PyQt强制要求的,而是Qt中关于唤出菜单功能的使用(就是Alt+F)。The ampersand in the menu item’s text sets Alt+F as a shortcut for this menu. (You can use “&&” to get a real ampersand in the menu bar.)
页面布局
Qt中的页面布局主要依靠 QHBoxLayout和QtGui.QVBoxLayout实现,它们可以将部件水平或垂直排列。PyQt与之类似:
def initUI(self):
        okButton = QtGui.QPushButton("OK")
        cancelButton = QtGui.QPushButton("Cancel")

        hbox = QtGui.QHBoxLayout()
        hbox.addStretch(1)
        hbox.addWidget(okButton)
        hbox.addWidget(cancelButton)

        vbox = QtGui.QVBoxLayout()
        vbox.addStretch(1)
        vbox.addLayout(hbox)

        self.setLayout(vbox)
先创建一个水平布局存放弹簧,OK和Cancle,然后再将这个水平布局放到一个垂直布局中,最后设置布局即可。而QGridLayout是网格布局,主要把控件一个一个的放进去。
grid = QtGui.QGridLayout()
self.setLayout(grid)
Qt中存在事件句柄,我们可以理解为事件处理程序。类似于中断处理程序(这么理解方便我理解),比如鼠标点击,键盘某个按键按下都会触发事件处理程序
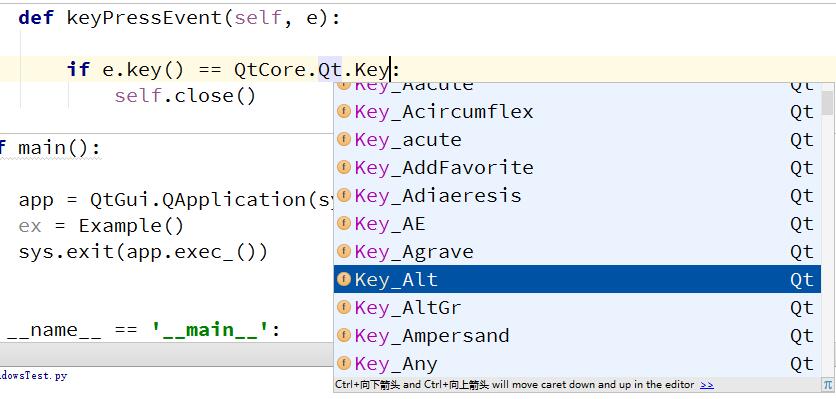
def keyPressEvent(self, e):

     if e.key() == QtCore.Qt.Key_Escape:
        self.close()
PyQt中也存在sender函数,通过这个函数可以知道是哪个变量发来的信号,以便对这个信号进行处理。
        btn1.clicked.connect(self.buttonClicked)
        btn2.clicked.connect(self.buttonClicked)

    def buttonClicked(self):
        sender = self.sender()
        self.statusBar().showMessage(sender.text() + ' was pressed')
如果在多个窗口之间进行信号传递就要使用emit的方式发射信号,当然,我们先要把信号槽建立起来才可以。
class Communicate(QtCore.QObject):
    closeApp = QtCore.pyqtSignal()
    def __init__(self):
        super(Communicate, self).__init__()

class Example(QtGui.QMainWindow):
    def __init__(self):
        super(Example, self).__init__()
        self.initUI()

    def initUI(self):

        self.c = Communicate()
        self.c.closeApp.connect(self.close)
        self.setGeometry(300, 300, 290, 150)
        self.setWindowTitle('Emit signal')
        self.show()

    def mousePressEvent(self, event):
        self.c.closeApp.emit()
通过这个代码可以看到class Communicate被实例化后创建信号closeApp,然后这个信号与close连接。其中closeApp的作用域是整个class Communicate。局部函数里定义的变量的生命周期在函数中。根据文档:pyqtSingal是用来定义signal,而pyqtSlot 则是用于定义slot函数。通过以上知识点,我们就可以开始编写基于PyQt的应用程序了。